Discrimination Mode
Discrimination mode is recommended for beginners. It provides quick information on the type and approximate depth of a buried object with minimal setup.
What You Can Do in This Mode
- Observe Target ID icons, Target ID value (0–100), and Target ID scale
- Adjust sensitivity using the Gain knob
- Adjust the discrimination level using the +/- buttons
- Adjust volume using the volume buttons
- Enter Pin-point mode to narrow the target location and read approximate depth
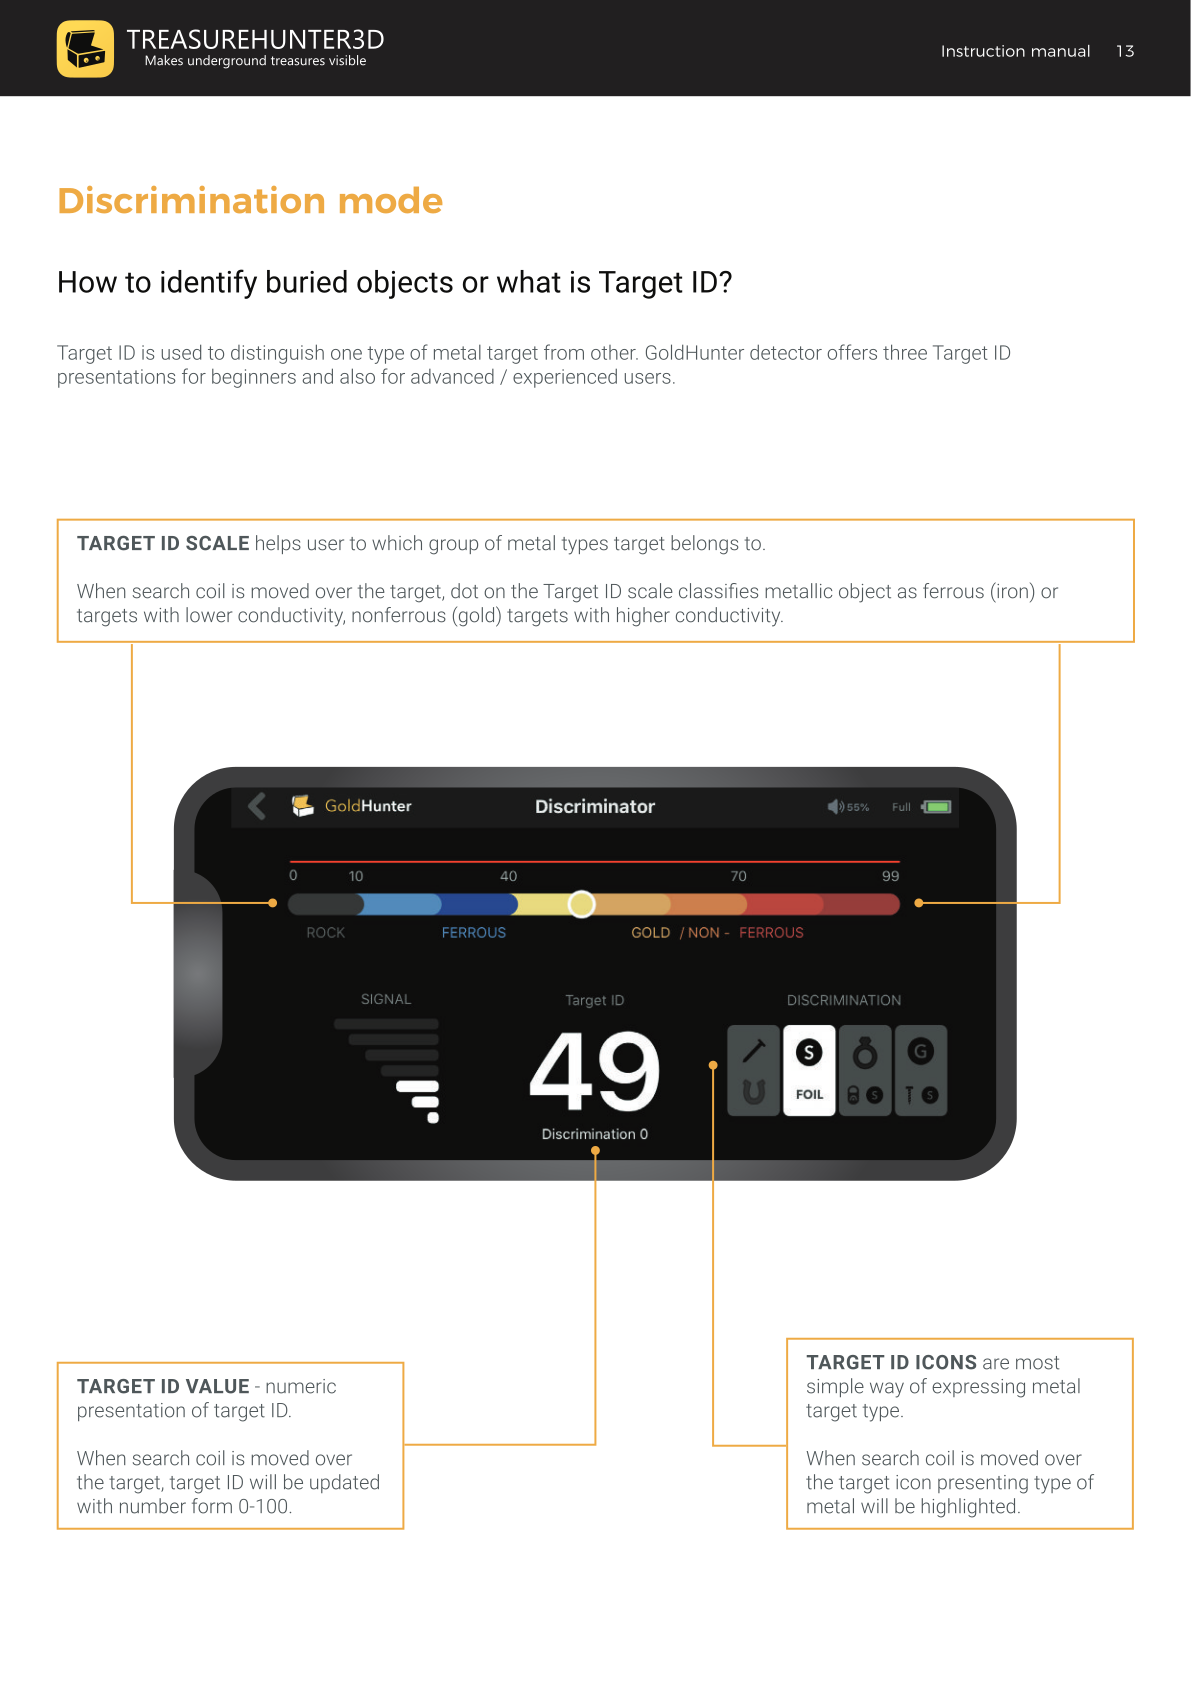
Understanding Target ID
Target ID is how GoldHunter classifies the type of metal it detects. There are three ways it is displayed simultaneously:
Target ID Scale
A horizontal scale running from 0 to 99, divided into zones:
| Zone | Range | Examples |
|---|---|---|
| Rock | 0–9 | Non-metallic rock |
| Ferrous | 10–69 | Iron objects, nails |
| Gold / Non-Ferrous | 70–99 | Gold, silver, copper, coins |
A dot moves along the scale when the coil passes over a target.
Target ID Value
A numeric readout (0–100) displayed in the centre of the screen. Updated each time the coil passes over a target.
Target ID Icons
Four icon groups highlight to show the likely category of the detected target:
| Icon | Examples |
|---|---|
| Iron / Ferrous | Nails, horseshoes, iron objects |
| Foil / Low conductor | Aluminium foil, low-value coins |
| Gold / Ring group | Rings, pull tabs, lower-value coins |
| Gold coin / High conductor | Low and high value coins, screwcaps |
Target ID accuracy is influenced by soil mineralisation, target angle relative to the coil, and target depth. Experience in the field helps you learn which Target ID values correspond to which target types in your local conditions. See Target ID Reference for common values.
Adjusting Sensitivity (Gain)
The Gain knob controls how deeply or finely the detector can detect objects. Higher gain means greater sensitivity — but also more susceptibility to noise.
For beginners, start with the Gain knob at the middle position (12:00). Increase gain only if you are not hearing any sound while sweeping over known-metal areas, or reduce it if the detector produces constant noise over clear ground.
Finding the Exact Location of a Target
- Sweep the coil over the signal location until you hear a beep.
- Rotate 90° and sweep again.
- The intersection of the two beep lines marks the exact location of the target.
Pin-Point Mode
Press and hold the Pin-point button to enter pin-point mode. In this mode:
- The approximate depth is displayed on screen in inches.
- The signal narrows, helping you pinpoint the target exactly before digging.
- The SIGNAL bars show relative depth or size — a strong signal means a large or very shallow target.
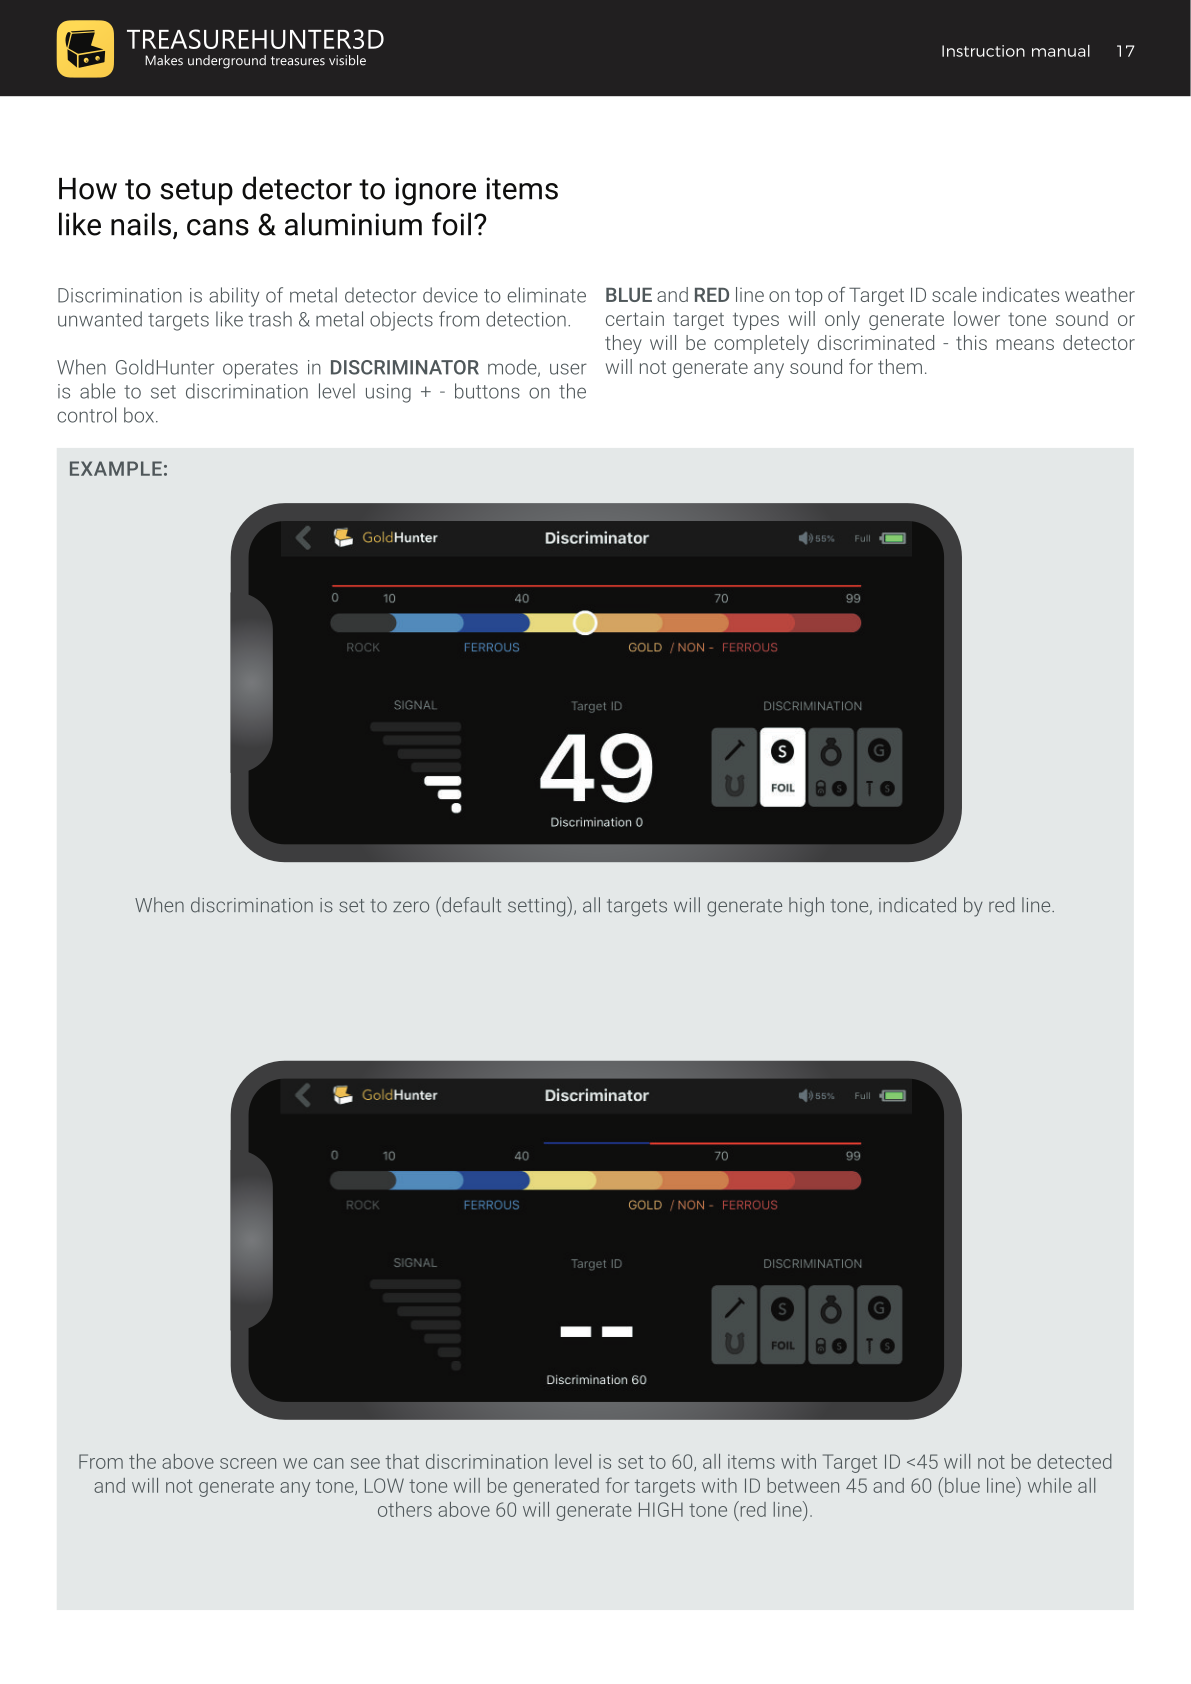
Setting the Discrimination Level
Discrimination eliminates unwanted targets (trash, nails, foil) from detection so you do not dig them up unnecessarily.
Use the +/- buttons to set the discrimination level:
- Discrimination 0 (default): All targets trigger a high tone (red line on scale).
- Raising discrimination to, e.g., 60: Targets with ID below 45 are silenced completely; targets between 45 and 60 trigger a low tone (blue line); targets above 60 trigger a high tone (red line).
A discrimination level of 60–70 is a good starting point to filter out most common trash while still detecting valuable targets. See Target ID Reference to understand which targets fall in which ID range.