Manual Scanning
In manual mode you fly the drone yourself using the remote controller while the DroneRover app records sensor data and maps it to GPS coordinates in real-time. This allows you to fly as low as 0.5 m above the surface for maximum sensitivity.
Step-by-Step
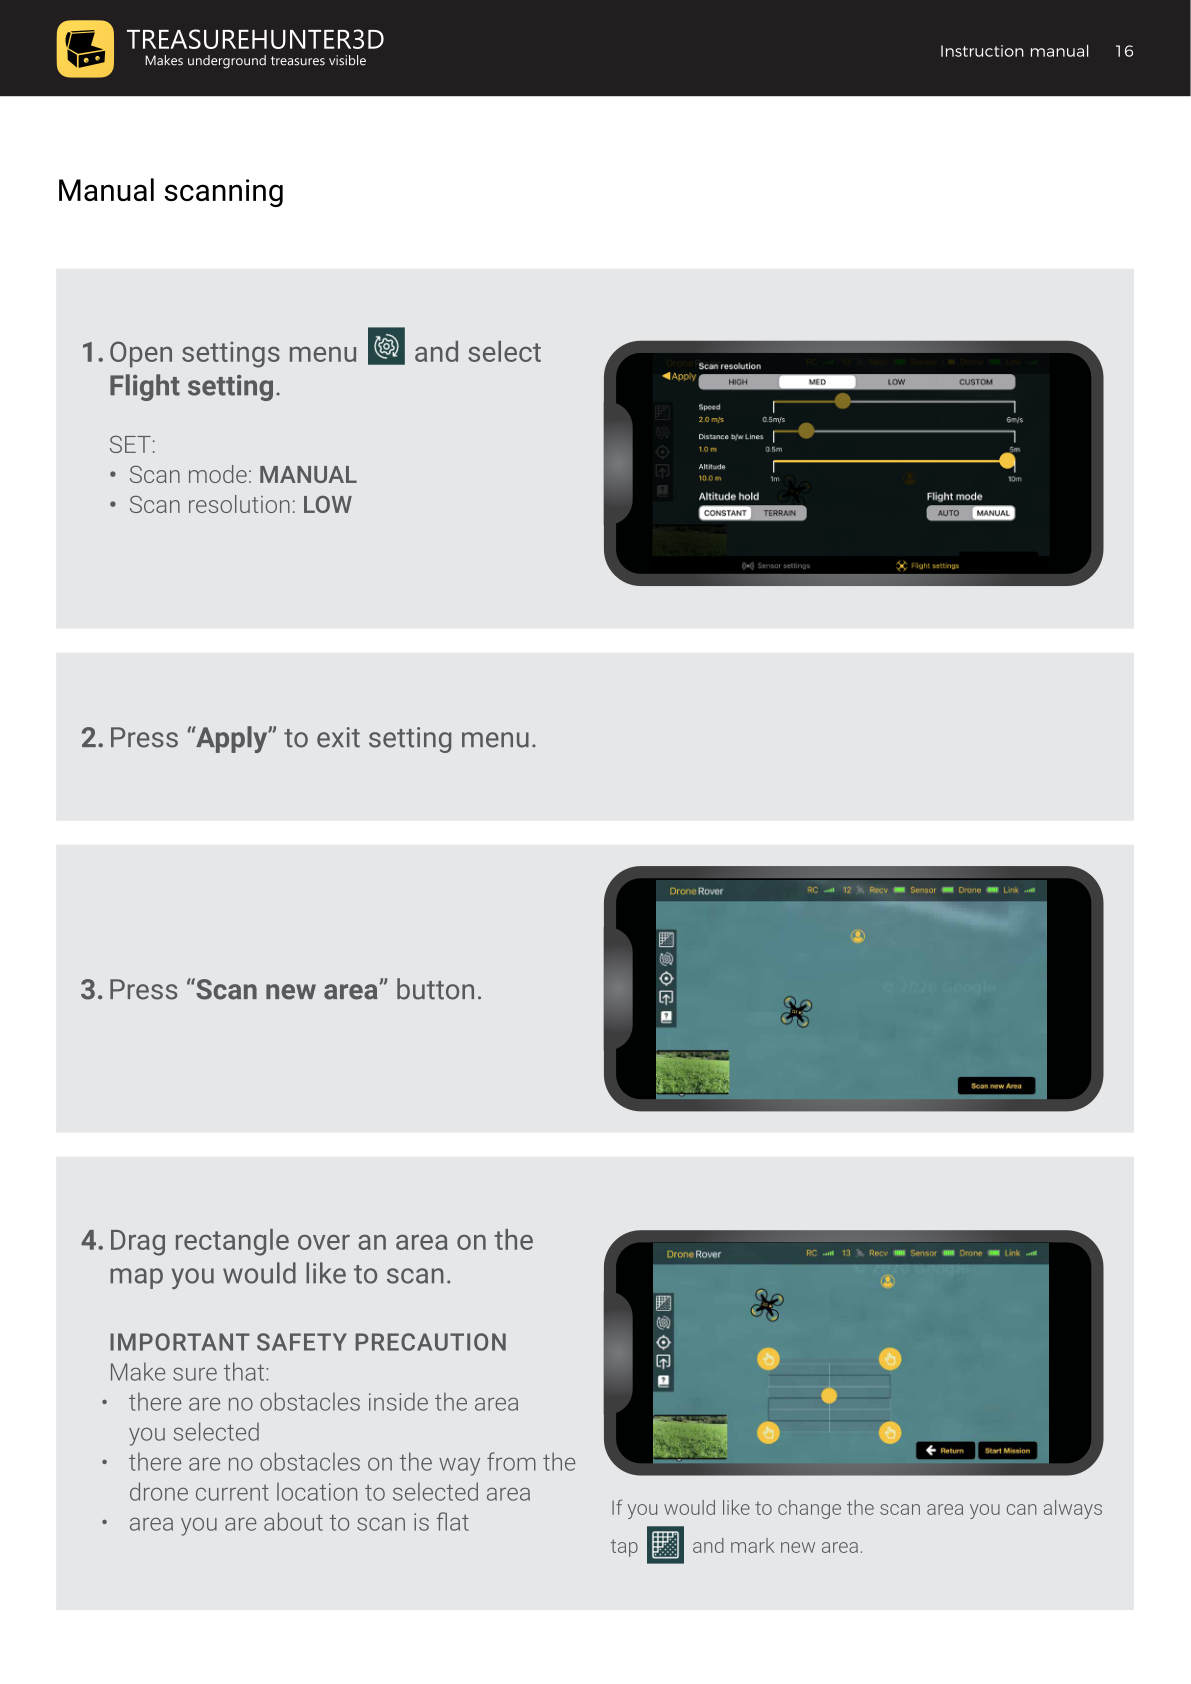
1. Configure Flight Settings
Open the Settings menu (gear icon) and select the Flight Settings tab. Set:
| Setting | Value |
|---|---|
| Flight mode | MANUAL |
| Scan resolution | LOW |
Press Apply to save and exit.
2. Press "Scan New Area"
Tap the Scan new area button on the main screen.
3. Draw the Scan Area
Drag a rectangle on the map over the area you want to scan.
Safety precautions
- No obstacles inside the selected area.
- No obstacles on the path from the drone's current position to the area.
- The terrain must be flat (use Terrain altitude hold for uneven ground).
4. Position Yourself Safely
Keep a safe distance from the drone and make sure you are not in the drone's path.
5. Start the Mission
Press Start Mission. The app checks GPS signal, battery, and drone status. A dialog then appears with three options:
| Option | Description |
|---|---|
| Auto take off | Drone takes off automatically |
| Manual take off | You take off using the remote controller |
| Cancel | Cancels the mission |
6. Fly & Scan
After takeoff, use the remote controller to fly the drone over the marked area to perform scanning.
Best practices for scan quality
- Fly as close to the ground as possible (0.5 m is ideal).
- Maintain a constant altitude throughout the pass.
- Fly at a constant speed of 2–3 m/s.
- Avoid fast or erratic movements — unstable flight causes false (grey) sensor readings.

DroneRover
Aerial Underground Scanner — DJI Phantom 4 Advanced
€5,299· ★★★★½ 4.9 (18 reviews)
DroneRover — free iOS app required to operate the system