Automated Scanning
In automated mode the drone takes off, covers the selected area on a pre-planned flight path, and returns home to land — all without manual flying.
Step-by-Step
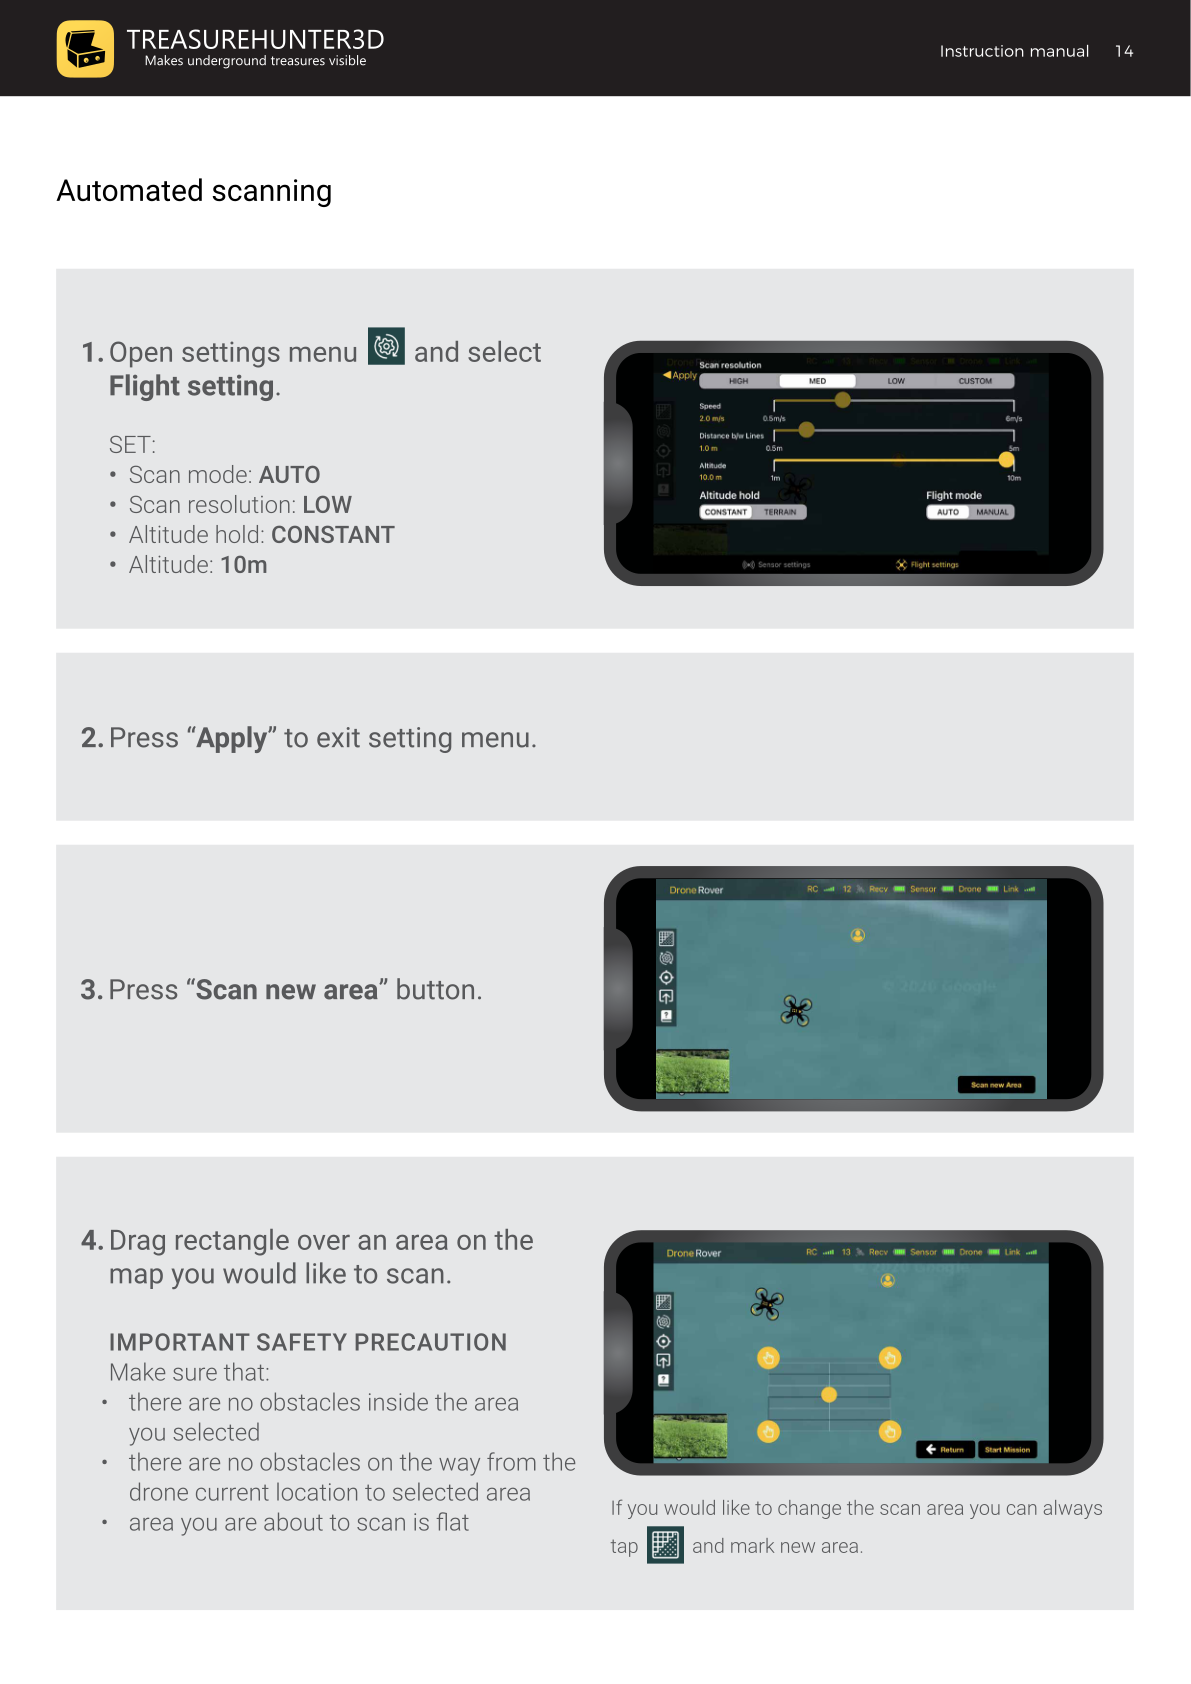
1. Configure Flight Settings
Open the Settings menu (gear icon) and select the Flight Settings tab. Set the following values for a first scan:
| Setting | Value |
|---|---|
| Flight mode | AUTO |
| Scan resolution | LOW |
| Altitude hold | CONSTANT |
| Altitude | 10 m |
Press Apply to save and exit the settings menu.
2. Press "Scan New Area"
Tap the Scan new area button on the main screen.
3. Draw the Scan Area
Drag a rectangle on the map over the area you want to scan.
- There must be no obstacles inside the selected area.
- There must be no obstacles on the flight path between the drone's current location and the selected area.
- The area must be flat.
If you need to adjust the area later, tap the grid icon and draw a new rectangle.
4. Position Yourself Safely
Make sure you are not standing in the drone's flight path to the scan area. Maintain a safe distance from the drone at all times.
5. Start the Mission
Press Start Mission and confirm takeoff in the dialog. The drone will:
- Take off automatically.
- Fly to the selected scan area.
- Scan the area in parallel passes.
- Return to its home position and land.
You can abort at any time using the Abort button in the app or the Home button on the remote controller — see Aborting a Mission for options.
6. Mission Complete
Once scanning is finished, the drone flies back to its home location and lands.
Some newer DJI firmware versions stop the drone approximately 0.5 m above the ground rather than completing the landing. In this case, confirm landing by pressing down on the left joystick of the remote controller.
Altitude Note
Due to national drone safety regulations, the autopilot can only fly 2 m above the surface in automated mode. For best sensor sensitivity, fly as close to the ground as possible (e.g., 0.5 m) — this requires using Manual scan mode.
