DroneRover Assembly — Mount Sensor on DJI Phantom 4
Follow these four steps in order before your first flight.
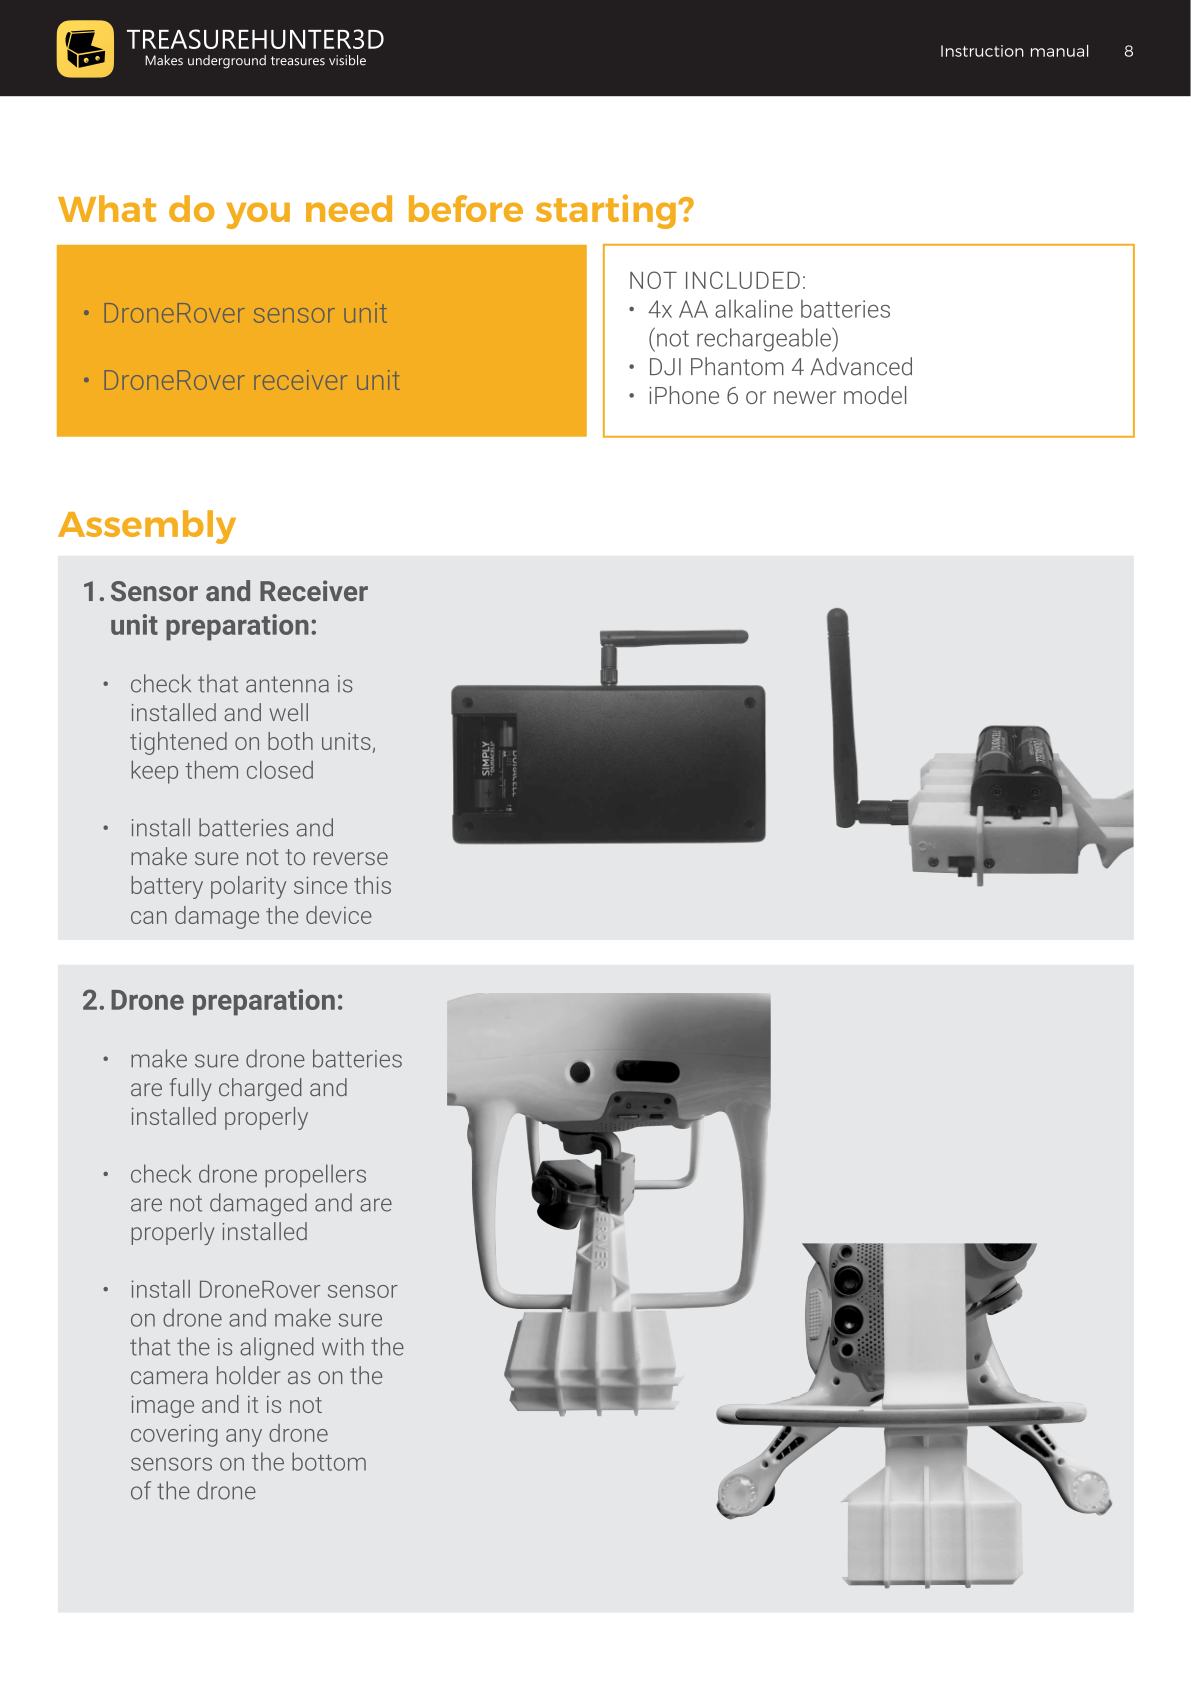
Step 1 — Sensor & Receiver Unit Preparation
- Check that the antenna is installed and well-tightened on both the sensor unit and the receiver unit. Keep the antenna housings closed.
- Install 4× AA alkaline batteries into each unit.
Battery polarity
Make sure the batteries are inserted with the correct polarity. Reversing polarity can permanently damage the device.
Step 2 — Drone Preparation
- Make sure the drone batteries are fully charged and installed properly.
- Check that all propellers are undamaged and properly installed.
- Mount the DroneRover sensor unit on the drone:
- Align the sensor with the camera holder (see manual diagrams for reference).
- Ensure the sensor does not cover any of the drone's bottom sensors.
Step 3 — Drone Remote Control Unit Preparation
- Make sure the remote control unit is fully charged.
- Attach your iPhone to the holder on top of the remote control unit and connect it with the original USB cable.
- Verify the P-S-A switch is set to the P position.
Step 4 — Check Smartphone & Drone Software
- Make sure your smartphone is running the latest iOS and that no background apps are running.
- Install the DJI Go 4 app and confirm:
- Drone and remote control unit have the latest firmware and fly-safe database installed.
- The drone compass is calibrated.
- The camera signal shows no lag and reports OK.

DroneRover
Aerial Underground Scanner — DJI Phantom 4 Advanced
€5,299· ★★★★½ 4.9 (18 reviews)
DroneRover — free iOS app required to operate the system